Contents
- Index
Full-screen Image View / Annotations Mode
To enter full-screen image view, while in the Pages Form double-click the image preview area or double click the thumbnail of the desire page you want to see.
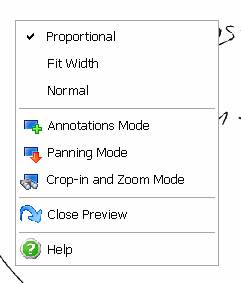
In menu order, menu item definitions are as follows:
Proportional
This displays the entire image on the full-screen. This may make the image hard to read, but easy to identify what type of page or document it is.
Fit Width
This fits the width of the image on the full-screen. You may have to use the vertical scroll bar to see the bottom of the page.
Normal
This displays the image as-is on the full-screen. If the image size is large, you may only be able to see a small section of the page at one time.
Annotations Mode
This option allows you to mark-up an image without actually changing the underlying image. The annotations can be printed or ignored as part of the printed page.
The below Annotations Toolbar will be displayed across the top of the full-screen.

To add annotations, hover the mouse cursor over the Toolbar button to display a hint about the type of annotation. Click on the desired annotation button and mark-up the image. Many of the annotations also have their own pop-up menu - click the desired annotation on the image (typically highlighted using black squares) and right-click to see if any further editing options exist.
To remove an unwanted annotation, click the desired annotation on the image (typically highlighted using black squares) and press the <Delete> key.
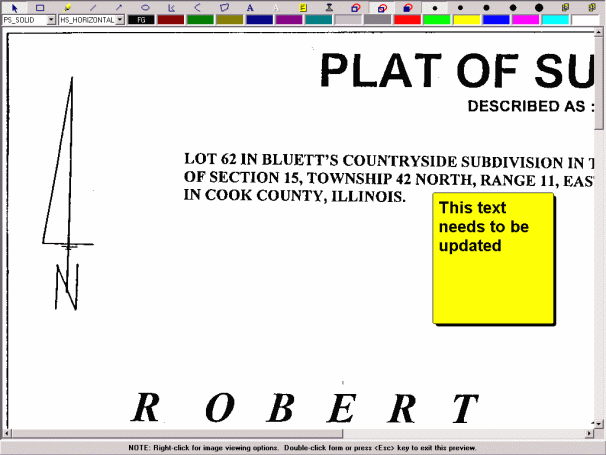
An example of an annotation in a document image.
NOTE: To print a document with annotations, right-click the main screen images preview area and make sure Annotations Printing On is checked. Then you may either print the document with annotations from the main screen's image preview area menu or from the document page grid menu.
Panning Mode
This option changes the cursor to a hand. Holding down the left mouse button allows you to grab and move the document to scroll to a different area of the document.
Crop-in and Zoom Mode
This changes the cursor to a small rectangle. Click and hold down the left mouse button to draw a rectangle around the desired area. When you release the mouse button, D2M will zoom-in to the selected area. Return to a normal viewing state by selecting Proportional, Fit Width, or Normal from the pop-up menu.
Close Preview
This closes the full-screen preview.
Help
This help section is displayed.
..